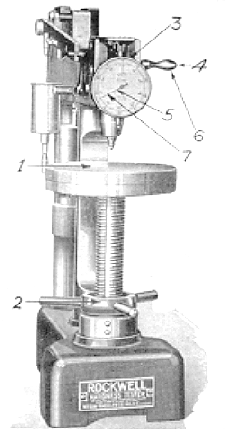
The Rockwell HardnessTesting
Machine
This picture contains
active zones. Click and Explore The testing machine has a table
(1) which holds the sample and raises it into contact
with the indenter
using the screw (2). After contact, the screw is turned
until the grove in the stem below the dial gauge (3) disappears and the pointer
(5) is in the vertical position. This applies a minor load to the sample.
The bezel of the gauge is then rotated so that the "set" arrow on the gauge
is directly behind the pointer. The crank handle (4) is then moved backwards
to load the indenter and push it into the sample. When the pointer comes
to rest, pulling the handle (6) forward lifts the major load from the indenter,
allowing the sample to relax elastically, but leaving the minor load applied.
The sample's Rockwell
hardness number can be read from the new pointer
scale position (7) .
| Menu |
| Prev |
| Next |